My First On-line Shop in inPage
We are introducing a new on-line shop module which enables the sale of goods or services on your own website. The whole on-line shop is based on the inPage philosophy, which is enabling our users to present their services on the Internet in the easiest way possible.
In the main menu of inPage Administration there is a new item – E-shop. Here you will perform all operations related to setting up and creating an on-line shop.
The Main On-line Shop Settings
On-line shop settings are under the item MANAGEMENT, which includes setting options - “E-shop configuration”, “Shopping and payment” and more.

On-line shop settings
After clicking the link “E-shop configuration”, a simple form will appear where you can set up the individual elements of your on-line shop, such as emails for receiving orders, on-line shop display in the main menu, numbering of orders, currency and more.
The picture below shows an example of a filled-in form.
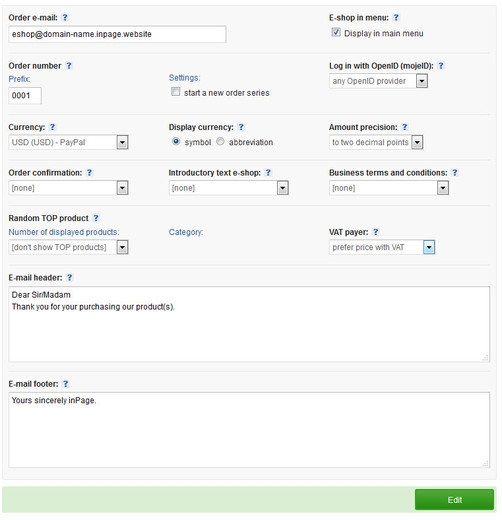
- Order e-mail: fill in your valid email address here; all received orders will be sent to this address
- On-line shop in menu: if you tick this box, a link to the on-line shop will be displayed in the main menu of your website
- Order number: here you can choose how orders will be numbered. Put up to 4 numbers in the “prefix” box. The number series of orders is automatically increased and it can be reset by ticking the option “start a new line of orders”.
- Currency + VAT payer: in the bookmark Currency, choose a currency type which can be used for shopping in your on-line shop. In the box “VAT payer” choose if you do or don't pay VAT.
- E-mail header: you can put in your own introductory text for customer order confirmation. The header is then followed by an order summary. In our example we thanked the customer for using our services in our on-line shop.
- E-mail footer: email footer is the opposite of email header and is shown at the end of the order summary. In the footer here we have inserted a text thanking the customer for their purchase and have informed the customer about the dates of good delivery.
Payment, delivery and other supplementary charges.
When you click the link “Shopping and payment”, a simple form appears in which you can set up charges for delivery and other charges related to ordering and delivering goods.

Put in a cost item which can be added to the order in the “Title” box and set a corresponding “Price”.
E.g.:
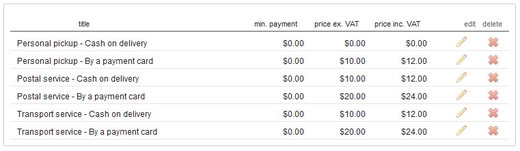
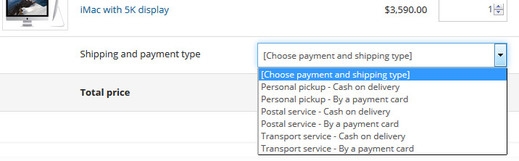
The amount you fill in will be added to the total price in the order form. This way, the user finishing the order will be able to choose a method of payment and a form of collection of the ordered goods.
The resulting display on the website may look like this:
At this point the basic settings of your on-line shop are done. You can go back to edit and change individual elements at any time.
Creating Categories in On-line Shop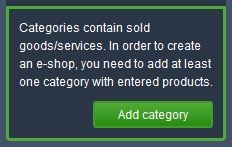
To set up an on-line shop you need at least one category with products. Products you offer can then be divided into categories. Examples of categories are Electronics, Toys, Cars or Furniture.
You create a category by clicking the bookmark CATEGORY and the green button “Add Category“ (in the on-line shop section on the right).
After clicking the button “Add Category“, a form will appear once more in which you can set up basic parameters of the category.
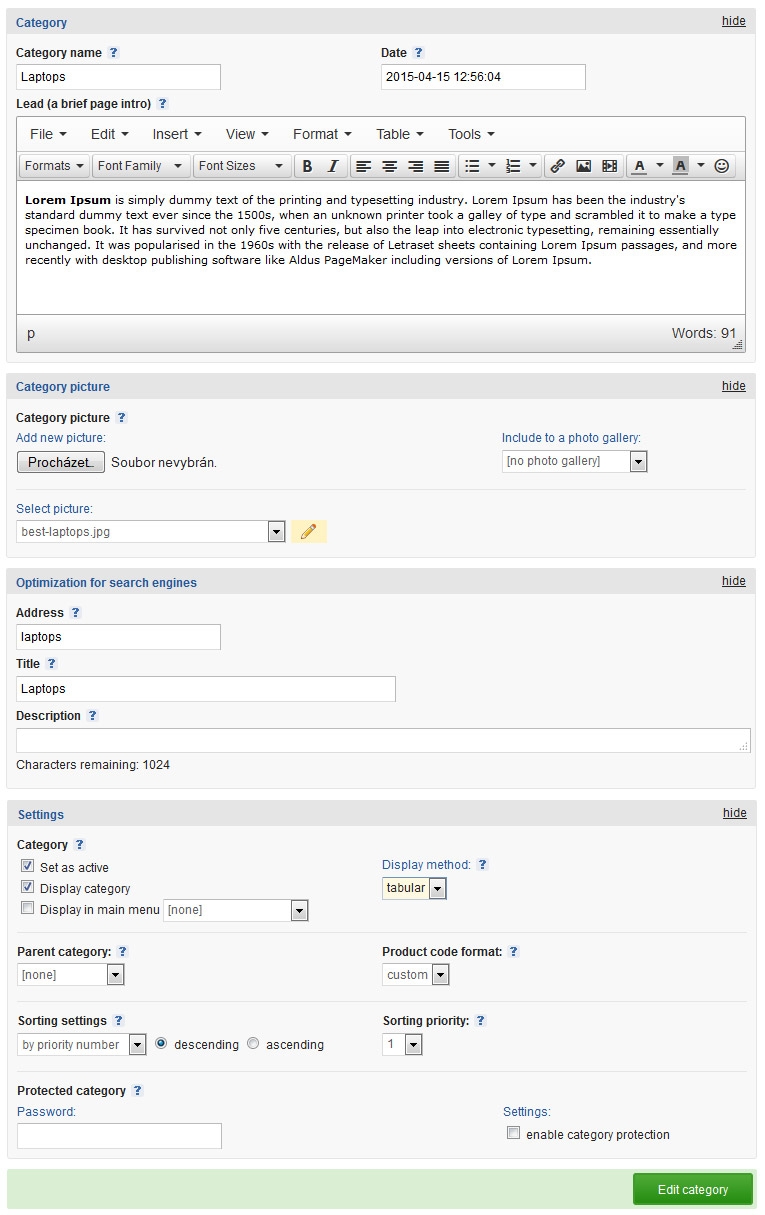
- Category name: fill in at your discretion, depending on what category you want to create. You don't have to fill in the address, it is completed automatically after saving. In our example we set up a category called “Laptops”.
- Description: if you want, you can fill in a category description. The description will be displayed above the overview of goods on the page.
- Category picture: you can upload a picture to each category which will then be displayed with the list of categories on the website. The picture should represent the whole category of goods or services which you will offer.
- Category: if you want a category to be displayed in the on-line shop section on the website, boxes “Set as active” and “Display in category” need to be ticked. Method of ordering in a category enables the set up of goods to be displayed on pages either in row by row layout (products are placed in rows under each other) or spreadsheet layout (goods are placed in two columns).
For the time being leave the other items in the original setting. Then complete the settings with the green “Edit” button.
The created category will then be displayed in the list of categories in the on-line shop section (on the right). We have set up a category called “Laptops”.
If you want to go back and edit a category you have already created, use the green pencil. If you want to add a product offer to a category, click the name of the category where the option “Add product” will be displayed.
Adding Products to Category
Work with adding products to a category is quite simple. Click on the name of the category you have created, where you want to place your product. A page with the link “Add product” will pop up. Click on this link and a form will appear where you can add basic information about the product.
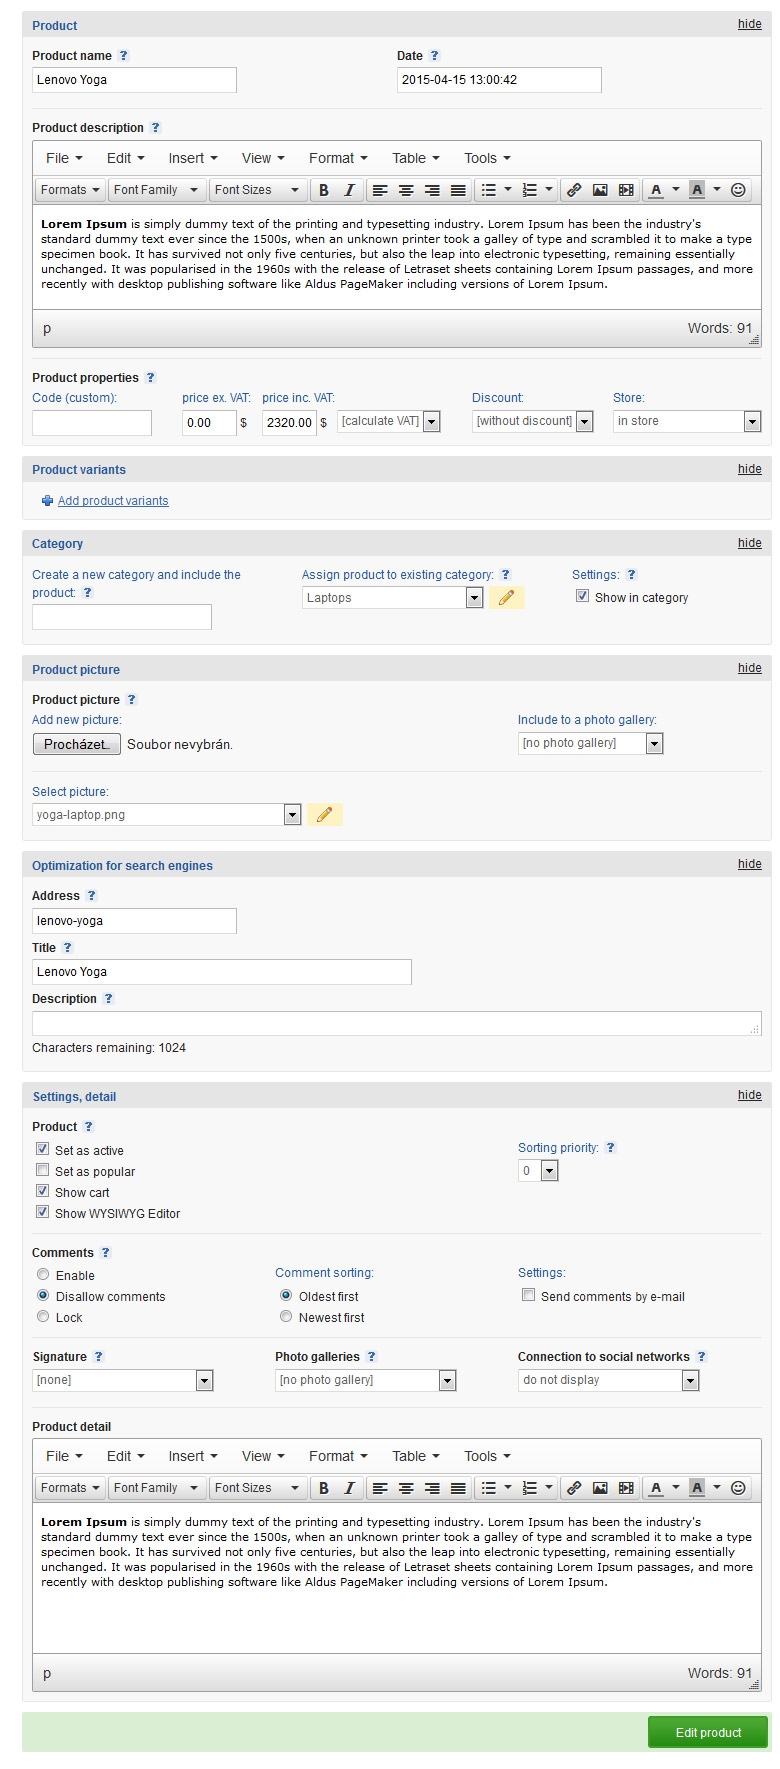
- Product name: here fill in the name of the product (in our example we filled in Lenovo Yoga). Leave the column Address blank, the address will automatically fill in after the page has been saved.
- Product properties: “Code” of the product is used for internal register of products and orders and you don't need to fill it in. “Price without VAT” and “Price with VAT”- for a VAT payer it is important to keep a record of both prices. If you set up that you aren't a VAT payer, you will only be able to fill in one price – with VAT.
- Product variants: fill in a basic description of products or goods
- Category: you can skip this item altogether. The product we are placing in the system now has already been assigned to a category we have already created - “Laptops”. You can add a product to a different category only if you are using the Premium version of inPage program (note: in program inPage Premium you can create up to 100 categories unlike in the versions inPage Start and Standard where you can create only one category).
- Product picture: the picture of a product is displayed automatically in the product detail and in the product overview. The picture can be uploaded directly from a disc and placed in a specific photo gallery. Alternatively, you can choose a picture from pictures which you have already uploaded.
- Settings: if you want a product to be displayed in an on-line shop category, both options “Set as active”.
For a simple on-line shop, the Product detail in the bottom part of the page doesn't need to be filled in. In the case of a more complex on-line shop, you can include e.g. more parameters of the product offered or goods in the editor.
All settings will then be saved by clicking the green button “Add product”. Other products are added to the chosen categories in the same way. In inPage Administration, products will be ordered in a clear list.
Sample of a Created On-line Shop
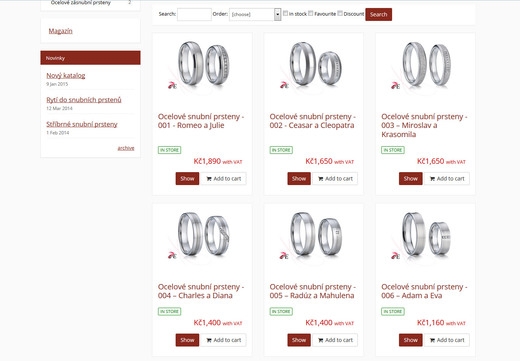
On-line shop with spreadsheet layout
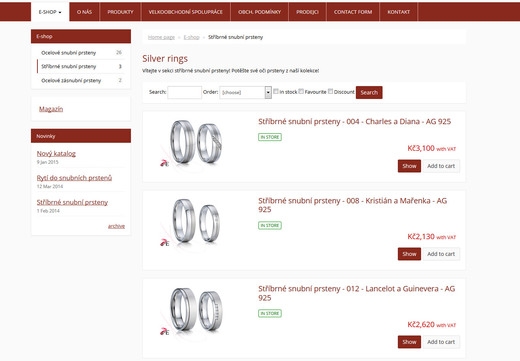
On-line shop with row by row layout
List of Received Orders
Just after choosing the ONLINE SHOP module, there will be a list of orders where you can manage individual orders (edit, delete, change their status etc.). This list will be active only after the first order has been made by a user and will expand with each new order.
Try placing the first order in your on-line shop yourselves, you can delete it from the list of orders later. This way you will also be able to check the verifying email from the customer's perspective and to see if the settings of your on-line shop are correct.
Good luck with creating your on-line shop Best wishes,
your inPage Team
Add comment
Comments - Overview