Administrative Interface inPage – Basic Introduction
Administrative interface is a web application tool which helps you manage the contents of web presentations. In the administration you can create individual web pages, upload pictures and files (which you then publish on your website), you can set up the basic page design, the template, the theme and other important elements which are parts of a successful web presentation.
If you are a beginner or haven´t come across inPage before, these instructions will help you find your way around inPage administration faster and advise you on how to start.
1. Setting Up the Design of Your Web Site
When creating a web presentation in inPage Administration you should first choose a basic template and theme for the pages (central picture of the pages). You will find these in the inPage administrative system under DESIGN.
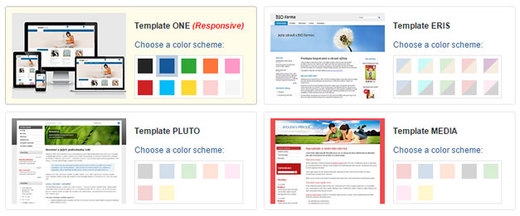
Choice of Template for Web Presentations
Individual system templates offer the optimal distribution of the site´s elements. You can choose templates with a horizontal or vertical menu. When you set up the basic template you can choose the colour combination based on your preference at the same time.
Setting up the template, however, isn't the only component of the design of a web presentation.
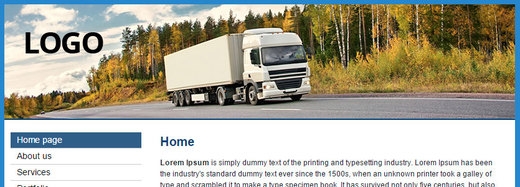
Website Theme and Logo
Another important element of website design is the graphical theme. inPage Administration offers universal themes in a so-called theme bank. So you can use the offer of a universal theme or you can upload and use your own graphic theme. Besides the theme, inPage system will enable you to upload your own website logo as well.
Design Adjustment with the Help of CSS for Advanced Users
inPage Administration offers its advanced users the possibility to comfortably change the pre-set look of templates or website structures with the help of CSS - Cascading Style Sheets. Thanks to the possibility to define your own CSS style, both simple and more complex changes can be made. On your website, you will be able to for example change the order of pages, text size and colour; set the spaces between signs and lines, margins and space around pictures, adjust the look of tables and much more. To be able to make such changes, you need to know the basis of working with CSS.
Example – Change of background with the help of CSS
To define your own CSS for background change you have to upload a picture with a background into inPage Administration first and then set up this script in the DESIGN – Own CSS style section:
body { background-color: #fff; }
 /* set up the heca code colour according to your needs */

body { background: url("/picture/3/name-of-image") center top transparent; }
 /* use the script top left repeat x if you want to repeat the picture in the background*/
2. Creating the Site Content
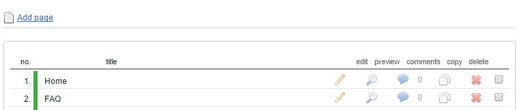
Adding a Page
A simple web can be created with only a few pages without the use of sections. You have to create the pages first in the PAGES section in inPage Administration. Individual articles can be then edited, updated and their display can be set up in the main menu any time.
Setting Up of Page Features
When creating pages, pictures and files in inPage Administration, you will encounter the functions active x inactive and display x hide. These functions enable you to make a certain element on the page accessible or inaccessible.
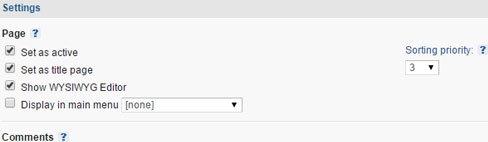
For example, if you set up a page as inactive while setting up display in the main menu, the page won't show on the web. If you want to use an element on your website, this element needs to be set up as active. Another useful function is the option to set up the page display, sections or photo gallery in the main menu or in the specific section.
Comments on Articles
A lot of users welcome the opportunity to add comments to articles; this way the website visitors can join a discussion about the topic discussed on the page or comment on a product.
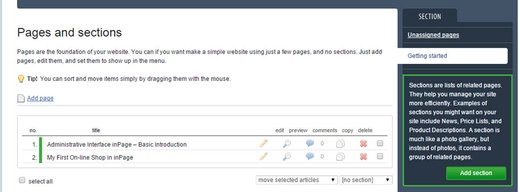
Creating a Section
For effective website management you can create SECTIONS, into which you then add relevant articles. If we have several pages with a similar topic, it is a good idea to group them into sections. A list of pages in the section and a link to the whole article on the page automatically appear when the section is shown in a web browser. Thanks to the section a list of news, a list of products, price lists etc. will be shown.
The Option to Password Protect a Section
In Administration you can use the useful function of section password protection. If you set up a section as protected, only a user who knows the password will be allowed access to the articles in the section.The Option to Password Protect a Section
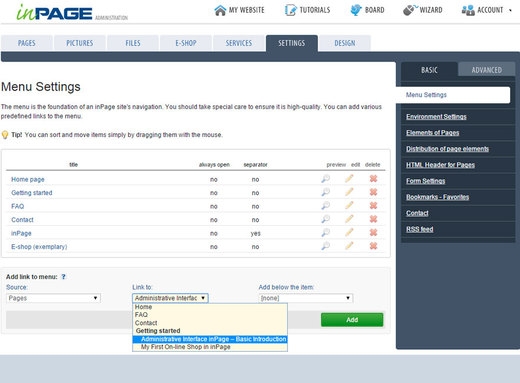
Setting Up the Sub menu
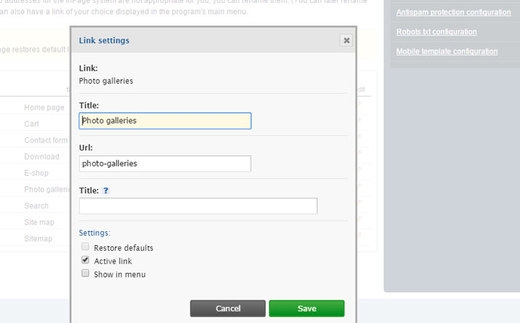
Another way of expanding the website structure is by creating a SUBMENU. You can create a sub menu by adding a link to the already existing item in the main menu.
You will find this option in Administration in the section SETTINGS – Menu settings; on the page there will be a list of links added to the main menu and in the list you will use the function ‘adding a link to menu’ (see picture below).
3. Working with Pictures and Design of Photo Galleries
Working with pictures is quite simple; first pictures need to be uploaded into Administration in the section PICTURES and then they can be used in articles or to show the overview of all photo galleries on the web and you can even add a photo gallery to an article or a product in an on-line shop.
Uploading Pictures
You can use the function of uploading pictures one by one when you set up any name and picture description or you can use the batch picture import function, for example into a prepared photo gallery. In one step you highlight the whole address book at once and start the upload of selected pictures into inPage (there is a detailed table with information about the progress and status of the pictures that are uploading).
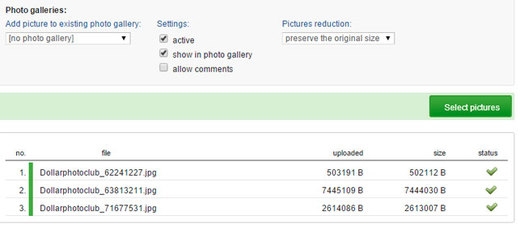
The function requires a modern browser (IE 6 and higher, FF 3 and higher, Opera 9 and higher) with an active Java script and technology support Flash (version 9 and higher). It is possible to upload up to 50 pictures on the server at once, each with a maximum size of 4 MB.
Displaying Photo Gallery on Web
If you create photo galleries from various events, holidays etc. in Administration, you can then publish a page on the website with all your photographs. The result can look like this:
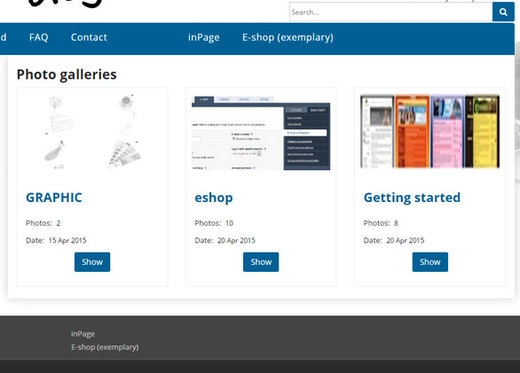
You can set up a link to the whole photo gallery in the main menu through administration in the section SETTINGS – Modification of set-up links. You also need to tick ‘display photo gallery’ in the main menu.
4. Working with Files
Firstly, upload files which you want to offer to your visitors to inPage Administration. The uploading is done in the section called FILES. After that you can display the files on the website as file to download or you can set up their display in the browser directly. Video and music files can be displayed on the specific page.4. Working with Files
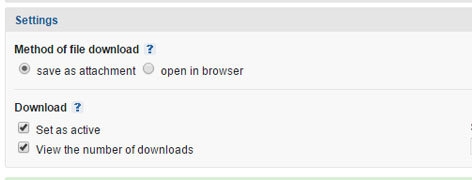
Files to Download
One option is to upload a file into Administration as File to Download. The file has to be set up as active. The way to download the file can be set up as needed (by saving an attachment or by opening it in the browser).
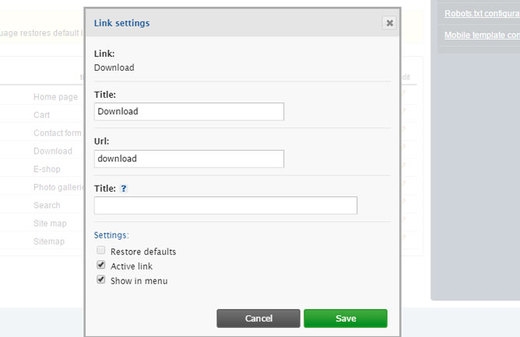
If you want your website to show the link Download in the main menu, set it up though the SETTINGS section – (switch to the bookmark Advanced) and here click on the link - Management of pre-set links.
Playing Video Files
To play video files directly you have to use a flash player; there are enough of them to download on the Internet (be careful about license conditions, the player might not always be used in e.g. commercial applications). We recommend using FlowPlayer, which is a part of inPage.
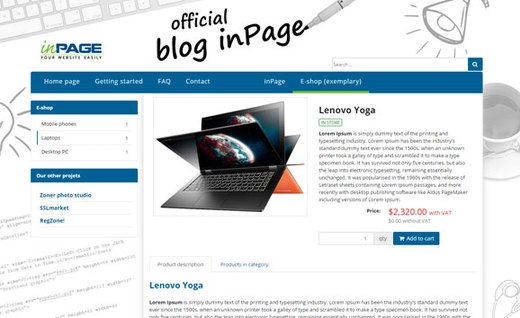
5. Creating an On-line Shop
On-line solution in inPage has been created with the intention of making management and setting up as simple as possible. The set up is done in two items: Setting up an On-line shop and Payment and Transport. After clicking the section ONLINE SHOP in the right column in Administration, you will see the bookmarks MANAGEMENT and CATEGORIES.
Management and Setting Up of On-line Shop
Under the bookmark MANAGEMENT, there are the links needed to set up an on-line shop, a list of orders, where you can manage individual orders (adjust, delete, change status etc.), a list of goods, payment and transport, goods comparison tools etc.
After clicking on the link Setting Up an On-line Shop, a simple form will appear where you can set up individual elements such as email for receiving orders, display of the on-line shop in the main menu, numbering of orders, currency and more.
Creating Categories and Adding Products
Under the bookmark CATEGORIES you can create and manage the individual categories of the on-line shop. You can add products (goods/services) and in Categories you can set up displaying goods in row or table layout.
Adding products to categories is quite simple. Would you like to know more about setting up an on-line shop in inPage? We recommend reading these instructions:
To display the on-line shop on the website, it is necessary to create at least one category with the given products.
6. General Settings of the Website
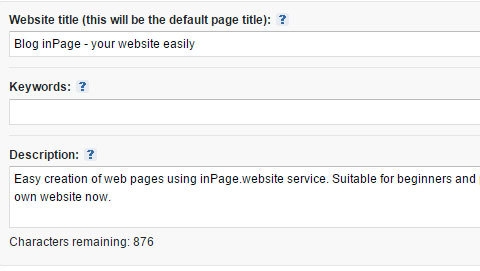
HTML Page Heading
Nowadays there are a lot of tools which can optimize your website for browsers. One of the elements of creating a website which you shouldn't forget and which will help your site's ranking in the browser is setting up the HTML page heading.
SEO (= search engine optimization) of website and the whole content of inPage
inPage Administration enables you to focus on the complete SEO of the website. Each page, section, photo gallery or in categories and products in the on-line shop you can optimize and set up your own title, description and site address.

If you then focus on well-written, interesting and unique content and the creation of correctly structured headings, it will be easy to optimize any page of your website for the main key words and phrases. This way you can easily influence the position of your website in search results.
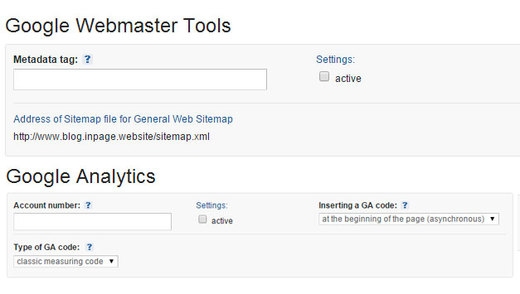
Tools for Web Managers
In inPage there is a file of tools for Google Webmaster Tools and Google Analytics web managers. These tools bring you a free and simple method of adjusting your website so that it cooperates better with Google services. It enables the display of your website in Google, it helps uncover problems and share information for better visibility of your website.
The Google Analytics service enables you to follow detailed statistics of the access to your website. The service is free for all advertisers, issuers and website owners.
Further Useful Functions of the Administration
inPage Administration provides a lot of useful functions for website management. One of them is the option to set up a parking page while your website is under reconstruction. In Administration you can change the language of application and website administration, for now basic translations into Slovak, English, German, Hungarian and Polish are available. Of course there is the option to change access details as well. All this and more will be available to you thanks to the control elements of the administration interface inPage.
Thanks to the easy use of the inPage administration, creation of web presentations is available to anyone.
Add comment
Comments - Overview